Bleam: 🔨 Build and 🚀 Share simple 🕹️ Turn Based Games without any Code!!
Table of contents
What is Bleam❔
It is a tool for building very simple turn-based games by uploading images of the players, their attacks and the background.
You can checkout Bleam here and the code.
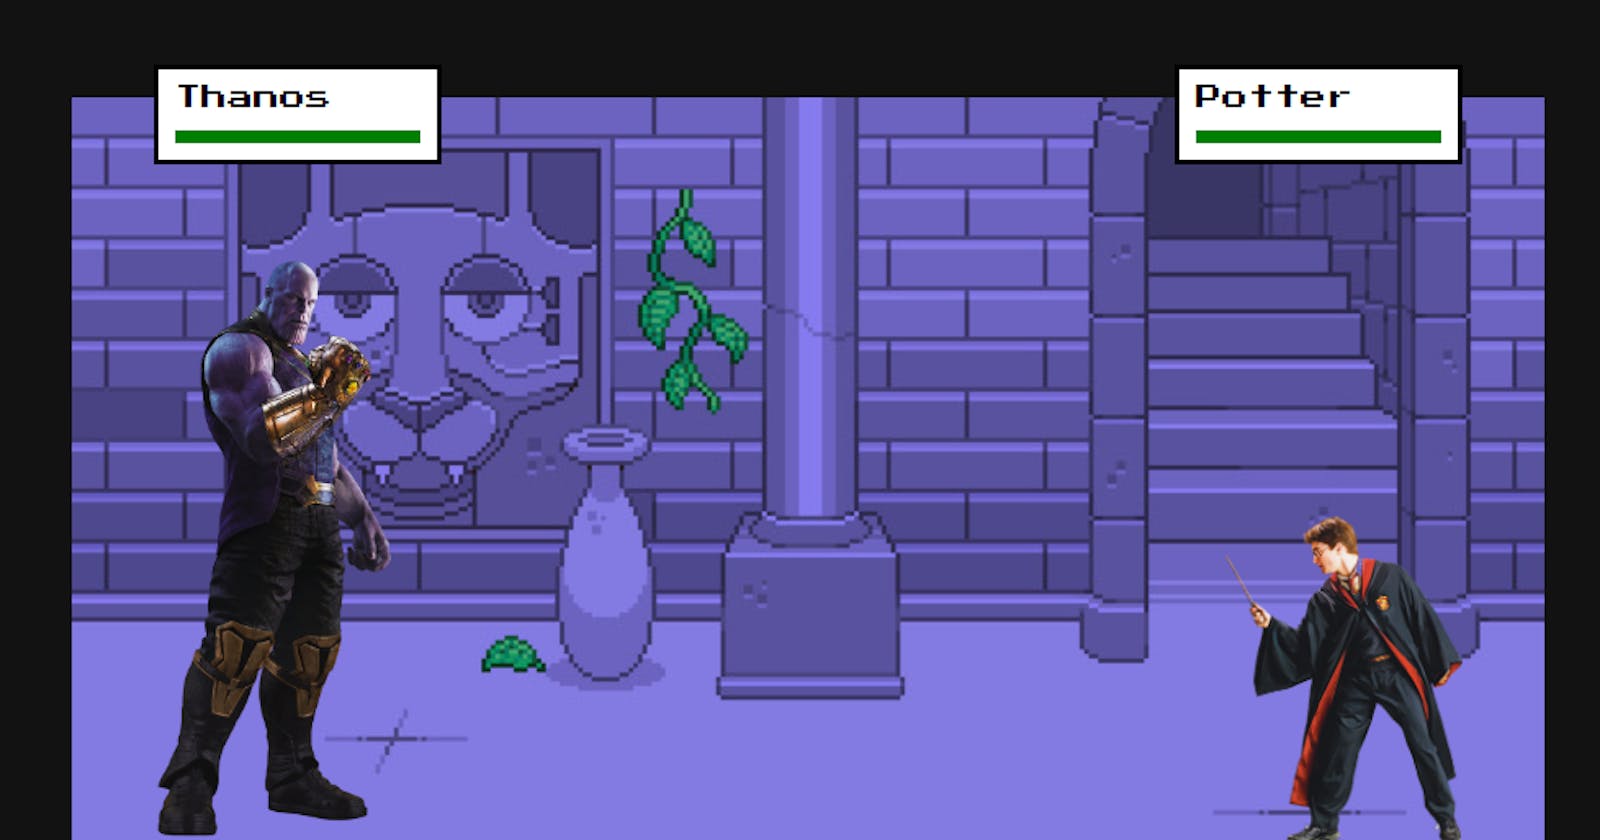
Here's a few demos

This post is a sort of my Devlog building Bleam.
Background🌄
I am working on a game to make math more inviting for kids who find it dreadful to even think of.
Some games try to solve this problem, but they have characters and storylines that don't interest most kids. An essential aspect of this game is that the players build the game by uploading the assets and some information on the characters. It hopefully excites and motivates them to learn math to get better at the game.
However, I have zero game dev experience, so I wanted to build a simple game builder which I could use for the final project.
Why Amplify?🤔
First, I was curious since I've never used solutions like Amplify before.
Second, I wanted to focus on the game rather than the APIs since they would be simple CRUD operations.
However, images and authorization are essential aspects which are time-consuming but so quick with AWS Amplify. All I did for the API was write one schema for the Game Data Model, and the Studio handled Authentication and Storage for the assets.
If I had to build the API by myself with these features, I definitely could not have built this in a few days because I was building this after work.
So, if you want a fully functional API without much effort, then Amplify is a good option.
How did I build this?🏗️
As I mentioned before, I have ZERO experience with animations and any sort of game dev.
My first thought was Unity, but learning a new language and how to use the software didn't seem like a good use of my time. So I searched for game dev tutorials using JavaScript and found this Pokémon JavaScript Game Tutorial with HTML Canvas, which I liked because of the simple Turn-based game it has, which was a perfect start for me. I didn't care for the other parts of the game.
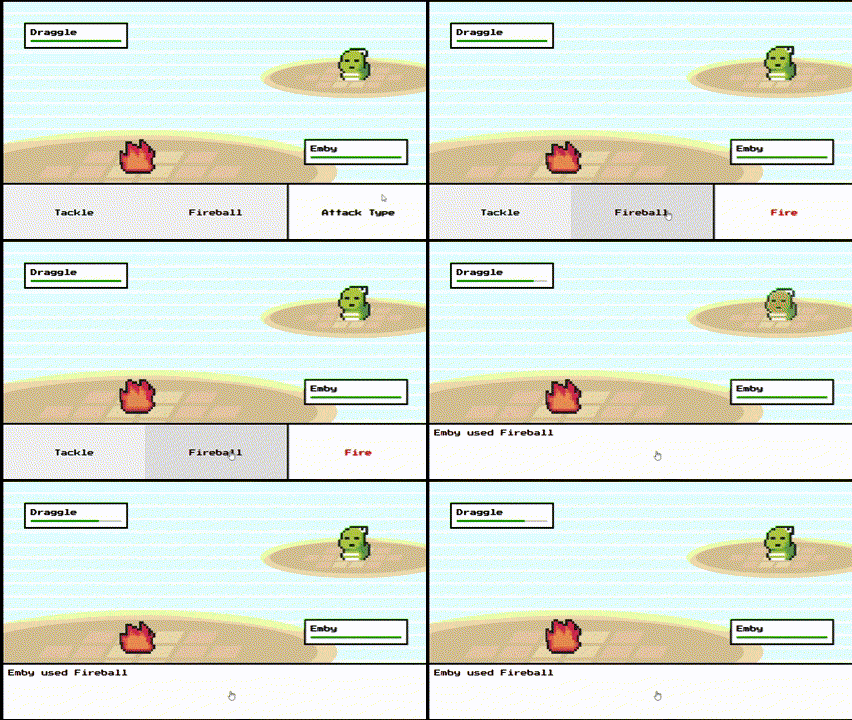
There are two characters with two attacks. The opponent plays after you take a turn playing, showing the actions performed like classic turn-based RPGs.
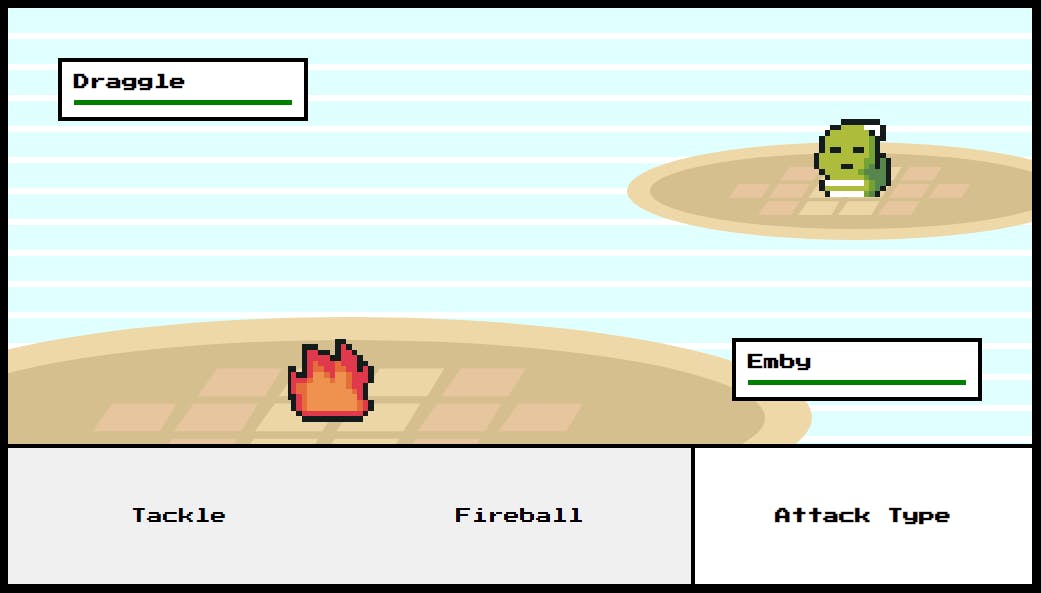
I tried to rip off the code of this project, but it was built using the OOP paradigm, the canvas element and raw DOM manipulations.
I wanted to build this with React, and after some thinking, I figured it wouldn't be too complex to build if I didn't care for the fancy animations.
So I scaffolded a blank React app with TypeScript using Create React App and began building.
Building the Game🎮
The next few sections will cover how I built the game using GSAP.
The one with CSS Animations✨
I sketched out a simple version using Excalidraw to keep track of stuff.
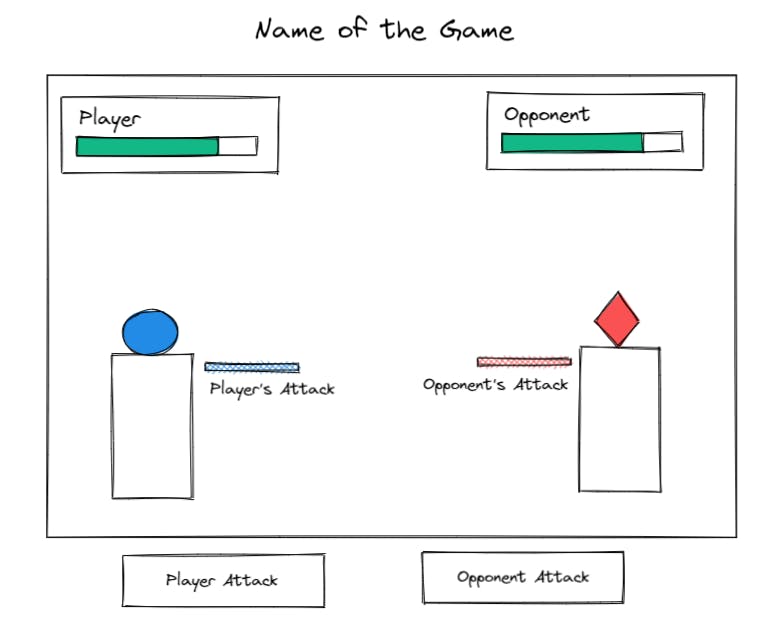
The idea was to have two state variables for the health of the players, and when a player attacks, the health of the opponent decreases by a fixed amount. Super simple.
I knew I had to figure out animations if I didn't want to get stuck later. I had just skimmed through the code of the Tutorial and didn't see how animations were handled, but after playing the game, I boiled the attack animation down to 2 things:
- Rapidly showing and hiding the character
- Jiggle sideways to seem like the character had been hit
Weirdly, I had this urge to figure out animations by myself. After some searches on CSS animations and keeping it performant when using React, I came up with this masterpiece. You can check out the code and demo to see how bad this draft was.
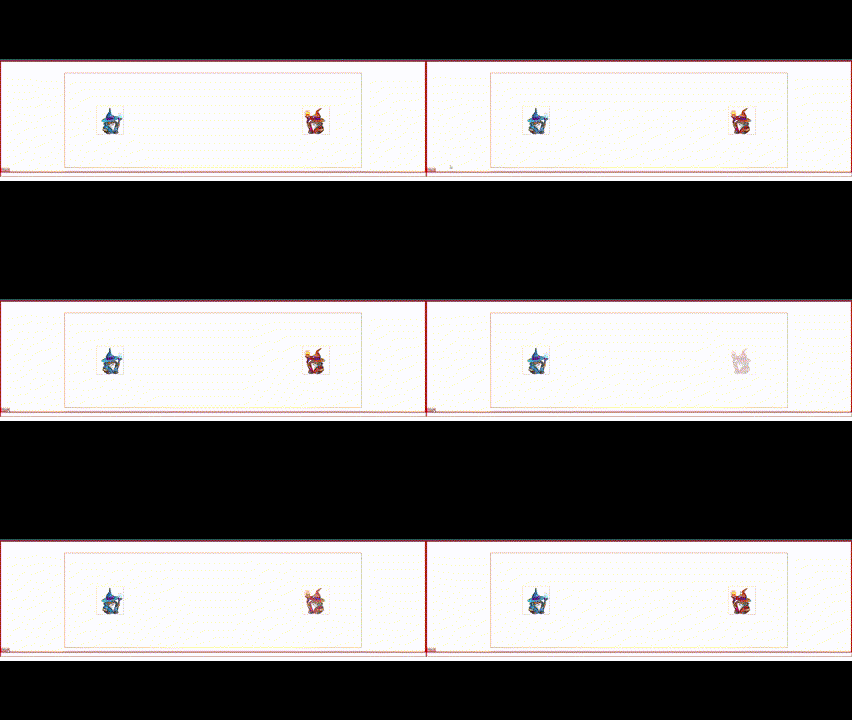
With this draft, I realised that my goal of making the game simple to build for kids would not be easy to achieve with CSS animations like this, so I decided to watch the tutorial for real this time and found out about GSAP and the APIs were easy to understand and use. It also became clear that I could eventually map a set of UI controls to GSAP Tweens and Timelines.
Animations with GSAP are much simpler😌
After playing around with GSAP for a while, I got a decent animation with readable code, which is more like a DSL than code.
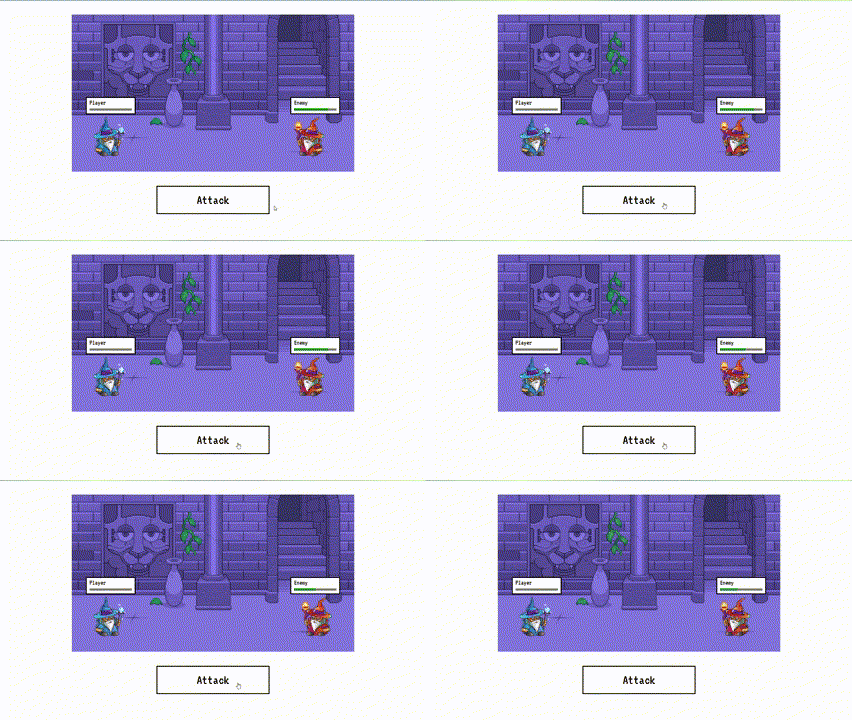
Here's the code for this version:
import { useEffect, useState, useRef } from "react";
import { gsap } from "gsap";

import "./App.css";

const hurt = (target: gsap.TweenTarget, facingLeft = true) => {
  // Blink
  gsap
    .timeline({ repeat: 2 })
    .to(target, { visibility: "hidden", duration: 0.1 })
    .to(target, { visibility: "visible", duration: 0.1 });

  // If target is facing left then move to right first and vice-versa
  const directionMultiplier = facingLeft ? 1 : -1;

  // Move back and forward
  gsap
    .timeline()
    .to(target, {
      x: -20 * directionMultiplier,
      duration: 0.1,
    })
    .to(target, {
      x: 40 * directionMultiplier,
      duration: 0.1,
    })
    .to(target, {
      x: 0 * directionMultiplier,
      duration: 0.1,
    });
};

function App() {
  const playerRef = useRef(null);

  const enemyRef = useRef(null);
  const enemyHealthRef = useRef(null);
  const [enemyHealth, setEnemyHealth] = useState(100);

  useEffect(() => {
    gsap.to(enemyHealthRef.current, {
      value: enemyHealth,
    });
  }, [enemyHealth]);

  const handleAttack = () => {
    hurt(enemyRef.current);
    setEnemyHealth((prev) => prev - 20);
  };

  return (
    <div className="game">
      <div className="arena">
        <div>
          <div className="player-stats">
            <span>Player</span>
            <progress max={100} />
          </div>

          <img ref={playerRef} className="character" alt="" src="src/assets/player.png" />
        </div>

        <div>
          <div className="player-stats">
            <span>Enemy</span>

            <progress ref={enemyHealthRef} max={100} />
          </div>

          <img
            ref={enemyRef}
            className="character enemy"
            alt=""
            src="src/assets/enemy.png"
          />
        </div>
      </div>

      <button type="button" className="attack-btn" onClick={handleAttack}>
        Attack
      </button>
    </div>
  );
}

export default App;
Time for attacks⚔️
An attack is an image that goes from a player to the opponent and vice-versa.
I knew I had to use the fromTo() function of GSAP to move the attack. Still, it was hard to get the source and destination coordinates of the trajectory because, in the tutorial, it was hard coded based on the dimensions of the characters and the arena(the container).
But I had to determine these coordinates without any hardcoding regarding the position and dimensions of the assets because I wanted the players to have freedom over these parameters. I also had to rotate the attack. Otherwise, it would just look weird.
After some discouraging hours, fake Aha moments and relentless experimenting, I figured it out!
  const handleAttack = (source: Character, destination: Character, faceDirection: FaceDirection = "R") => {
    if (!(source.ref.current && destination.ref.current && fireballRef.current && arenaRef.current)) return;

    const fireballDOMRect = fireballRef.current.getBoundingClientRect();
    const sourceDOMRect = source.ref.current.getBoundingClientRect();
    const destinationDOMRect = destination.ref.current.getBoundingClientRect();

    const attackSourcePosition = {
      x:
        faceDirection === "R"
          ? source.ref.current.offsetLeft + source.ref.current.offsetWidth
          : source.ref.current.offsetLeft - fireballDOMRect.width,
      y: source.ref.current.offsetTop + 0.2 * sourceDOMRect.height,
    };

    const attackDestinationPosition = {
      x:
        faceDirection === "R"
          ? destination.ref.current.offsetLeft - fireballDOMRect.width
          : destination.ref.current.offsetLeft + destination.ref.current.offsetWidth,
      y: destination.ref.current.offsetTop + 0.2 * destinationDOMRect.height,
    };

    const dy = attackDestinationPosition.y - attackSourcePosition.y;
    const dx = attackDestinationPosition.x - attackSourcePosition.x;
    const radians = Math.atan2(dy, dx);
    const deg = (radians * 180) / Math.PI;

    gsap
      .timeline()
      .fromTo(
        fireballRef.current,
        {
          visibility: "visible",
          ...attackSourcePosition,
          rotate: deg,
        },
        {
          ...attackDestinationPosition,
        },
      )
      .set(fireballRef.current, {
        visibility: "hidden",
        onComplete: () => hurtCharacter(destination),
      });
  };
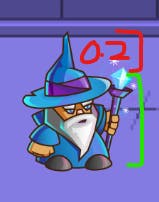
The only hardcoded number is 0.2, the height percentage offset from the top of the character where the attack would begin and land.
Abstraction time🏺
Now that I had all the pieces I needed, I had to abstract the functionality of characters so that I could have any number of characters in the game.
The result was this beautiful hook useCharacter which took care of the following:
ref- the characterattackRef- the character's attackhealthRef- the character's health meterhealth- the character's healthincreaseHealthanddecreaseHealthto manipulate the health- animation on the health meter
import React, { useState, useRef, useEffect } from "react";
import { gsap } from "gsap";

type HealthUpdater = (delta: number) => void;

export interface Character {
  id: string;
  ref: React.MutableRefObject<HTMLImageElement | null>;
  attackRef: React.MutableRefObject<HTMLImageElement | null>;
  healthRef: React.MutableRefObject<HTMLProgressElement | null>;
  health: number;
  increaseHealth: HealthUpdater;
  decreaseHealth: HealthUpdater;
}

const useCharacter = (id: string): Character => {
  const ref: Character["ref"] = useRef(null);
  const attackRef = useRef<HTMLImageElement | null>(null);
  const healthRef: Character["healthRef"] = useRef(null);
  const [health, setHealth] = useState<Character["health"]>(100);

  const increaseHealth: HealthUpdater = (delta) => {
    setHealth((prev) => Math.min(prev + delta, 100));
  };

  const decreaseHealth: HealthUpdater = (delta) => {
    setHealth((prev) => Math.max(prev - delta, 0));
  };

  // Update character's health
  useEffect(() => {
    gsap.to(healthRef.current, {
      value: health,
    });
  }, [health]);

  return {
    id,
    ref,
    attackRef,
    healthRef,
    health,
    increaseHealth,
    decreaseHealth,
  };
};

export default useCharacter;
The Game had all the assets and styles as props which the builder would eventually configure.
Integration with Amplify🤝
Now that the Game component was ready, I had to integrate with Amplify so that users could create and share games that others could play.
Users🧑
My first step was to integrate Authentication. I watched the video below by Ali Spittel to get an idea about how Amplify works.
But I needed Protected Routes and raw access to the authentication context to do whatever I wanted. I found this perfect guide by AWS Amplify, which had everything I needed to use Amplify along with React Router.
The Game Builder🎲
I googled for game builders and saw a common pattern of the config on the sides and the game in the centre, so I sketched this UI for the builder.
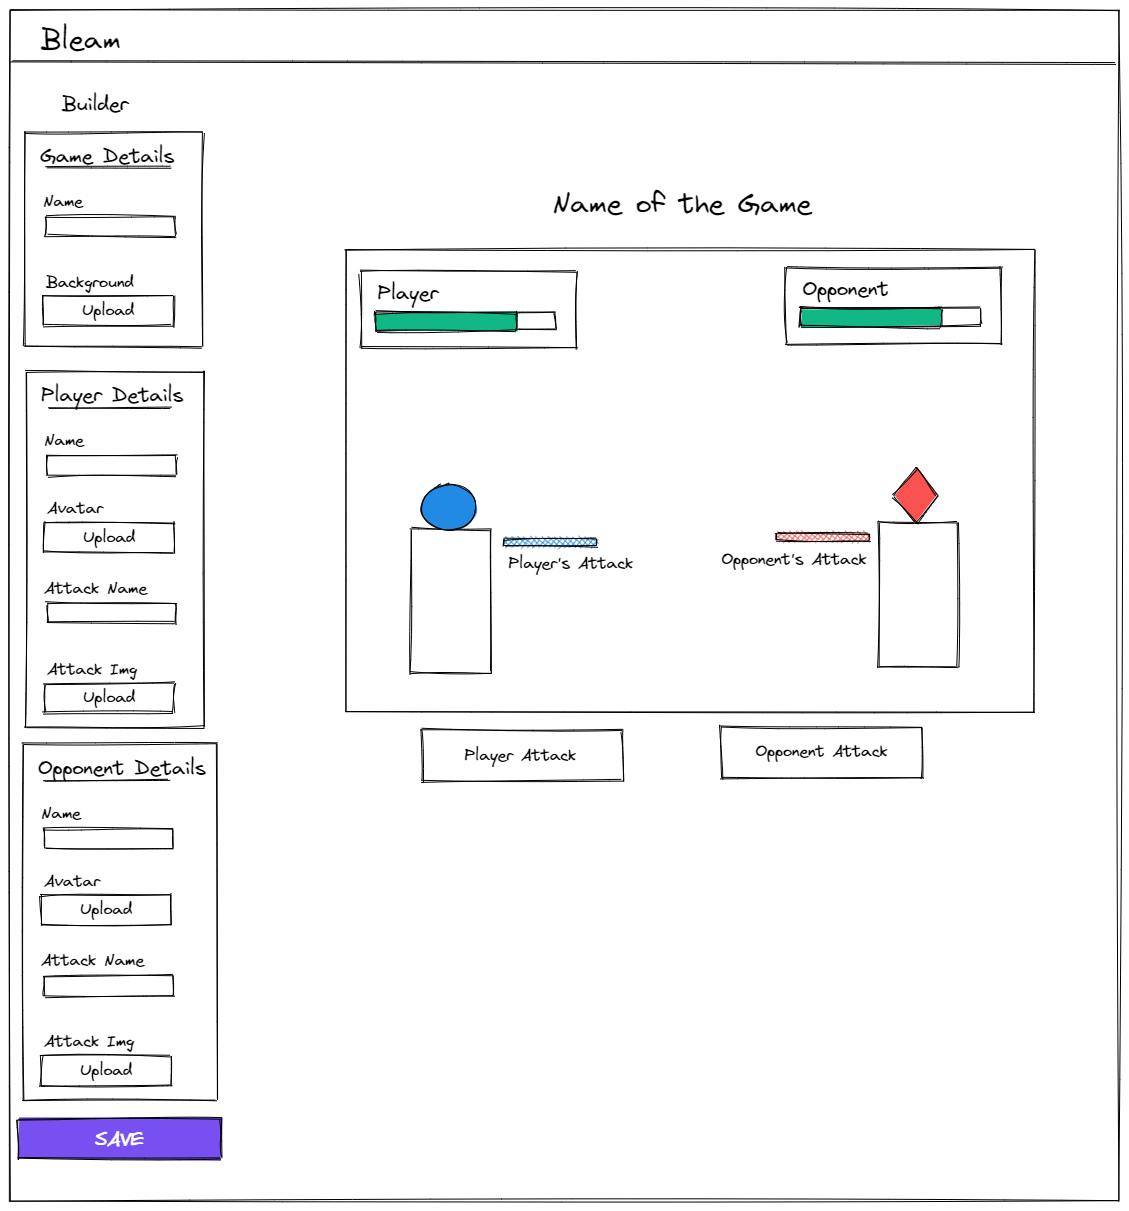
I kept the builder parameters very basic. I planned to incrementally add more style and animation-related parameters, but first, I needed this to work, and for that, I needed a schema to store the data needed for a game.
An important factor that I had to consider was room for flexibility. I could not have a rigid schema because, from my experience, I knew that change was bound to happen in the early stages of a project.
For some reason, when I built the Data Model using Amplify Studio, the mutations in the GraphQL API didn't update the data, but when I used the CLI and wrote the GraphQL schema by hand, it worked. Let me know if you have an idea about what I did wrong!
To add a GraphQL API using the CLI follow the instructions in the official guide.
GraphQL Schema for Game
type Game @model @auth(rules: [{ allow: public, operations: [read], provider: iam }, { allow: owner }]) {
  id: ID!
  name: String!
  data: AWSJSON
  public: Boolean @default(value: "false")
}
We need to add the iam provider for public read operations so that anyone who is not signed in can view and play games. We also need to accommodate this logic in our GraphQL queries. Here's a sample snippet for the listGames query. The actual code is here.
const { authStatus } = useAuthenticator((context) => [context.authStatus]);

const response = await API.graphql({
  query: listGames,
  variables: {
    filter: {
      public: {
        eq: true,
      },
    },
  },
  authMode: authStatus === "authenticated" ? "AMAZON_COGNITO_USER_POOLS" : "AWS_IAM",
});
The schema for the data attribute
It's the same as the props of the Game component except for the name attribute. I've not included the style attributes because I'm not using them now, but the component supports it.
interface GameObject {
  name: string;
  img: string | null;
}

interface CharacterProps extends GameObject {
  attack: GameObject;
}

interface GameData {
  preview: string | null;
  bg: {
    img: string | null;
  };
  player: CharacterProps;
  enemy: CharacterProps;
}
Storing Assets📂
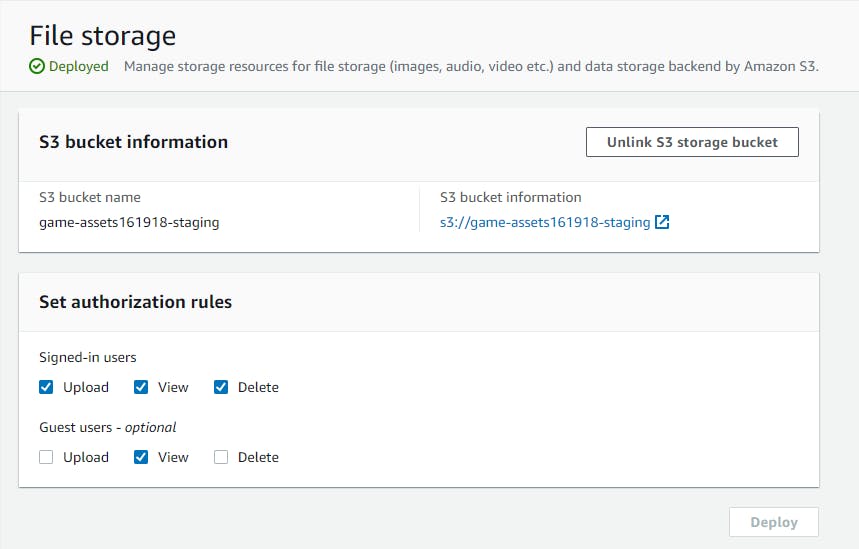
I used Amplify Studio to configure the S3 bucket to store the assets for every game. The authorization rules are shown below.
Usability problems ⚠️
While using this tool, I found some problems that make the whole process hard:
- Finding assets is very hard and time-consuming. So an asset library is very much needed.
- Assets found online need basic editing like resizing, rotating, flipping, etc.
- Positions of the characters are fixed, which would not work for backgrounds with different perspectives like top-down maps.
These stood out prominently, and let me know if you found any more!
The end...?🔮
Like I said in the beginning, this project is to help anyone get familiar with building a Game Builder for their own game or project.
Also, I will use this to build my next game, which aims to make kids more interested in learning math with the benefits of a game as the primary reward and hopefully get them hooked on Math. I realise it is highly ambitious, but it's worth it.
I will improve the builder by making it interactive with a drag-and-drop interface to position the characters and the attacks, along with basic image editing tools to make the process easier.
Hope you found this blog useful, and let me know if you have any suggestions to make this better!
Why the name "Bleam"?
